POS operations guide
Cafeteria POS and school canteen acceptance guide
A cafeteria counter must move a short queue without confusing a retail sale, student identity, meal entitlement, subsidy record or kitchen handoff. Define those systems separately, then prove one complete service period before rollout.
Evidence and review scope
Evidence reviewed 2026-08-20. First-party review of six cafeteria query rows plus the pinned source, published Windows sale, 57 vertical source tests, 91 kiosk-focused tests, 35 hardware protocol tests and synthetic restore record.
Stable release: v1.9.0, source commit archived source snapshot. No complete cafeteria service period, student identity, prepaid meal balance, entitlement, subsidy, allergen, nutrition, physical device, provider payment, accessibility or local food-program acceptance was executed.
What the current evidence establishes
Six direct queries, 50 impressions
The supplied Search Console exports contain six cafeteria or student-dining rows with 50 impressions and no clicks. They contain no landing page, country, device, date range, CTR, position or conversion dimensions.
One bounded local sale
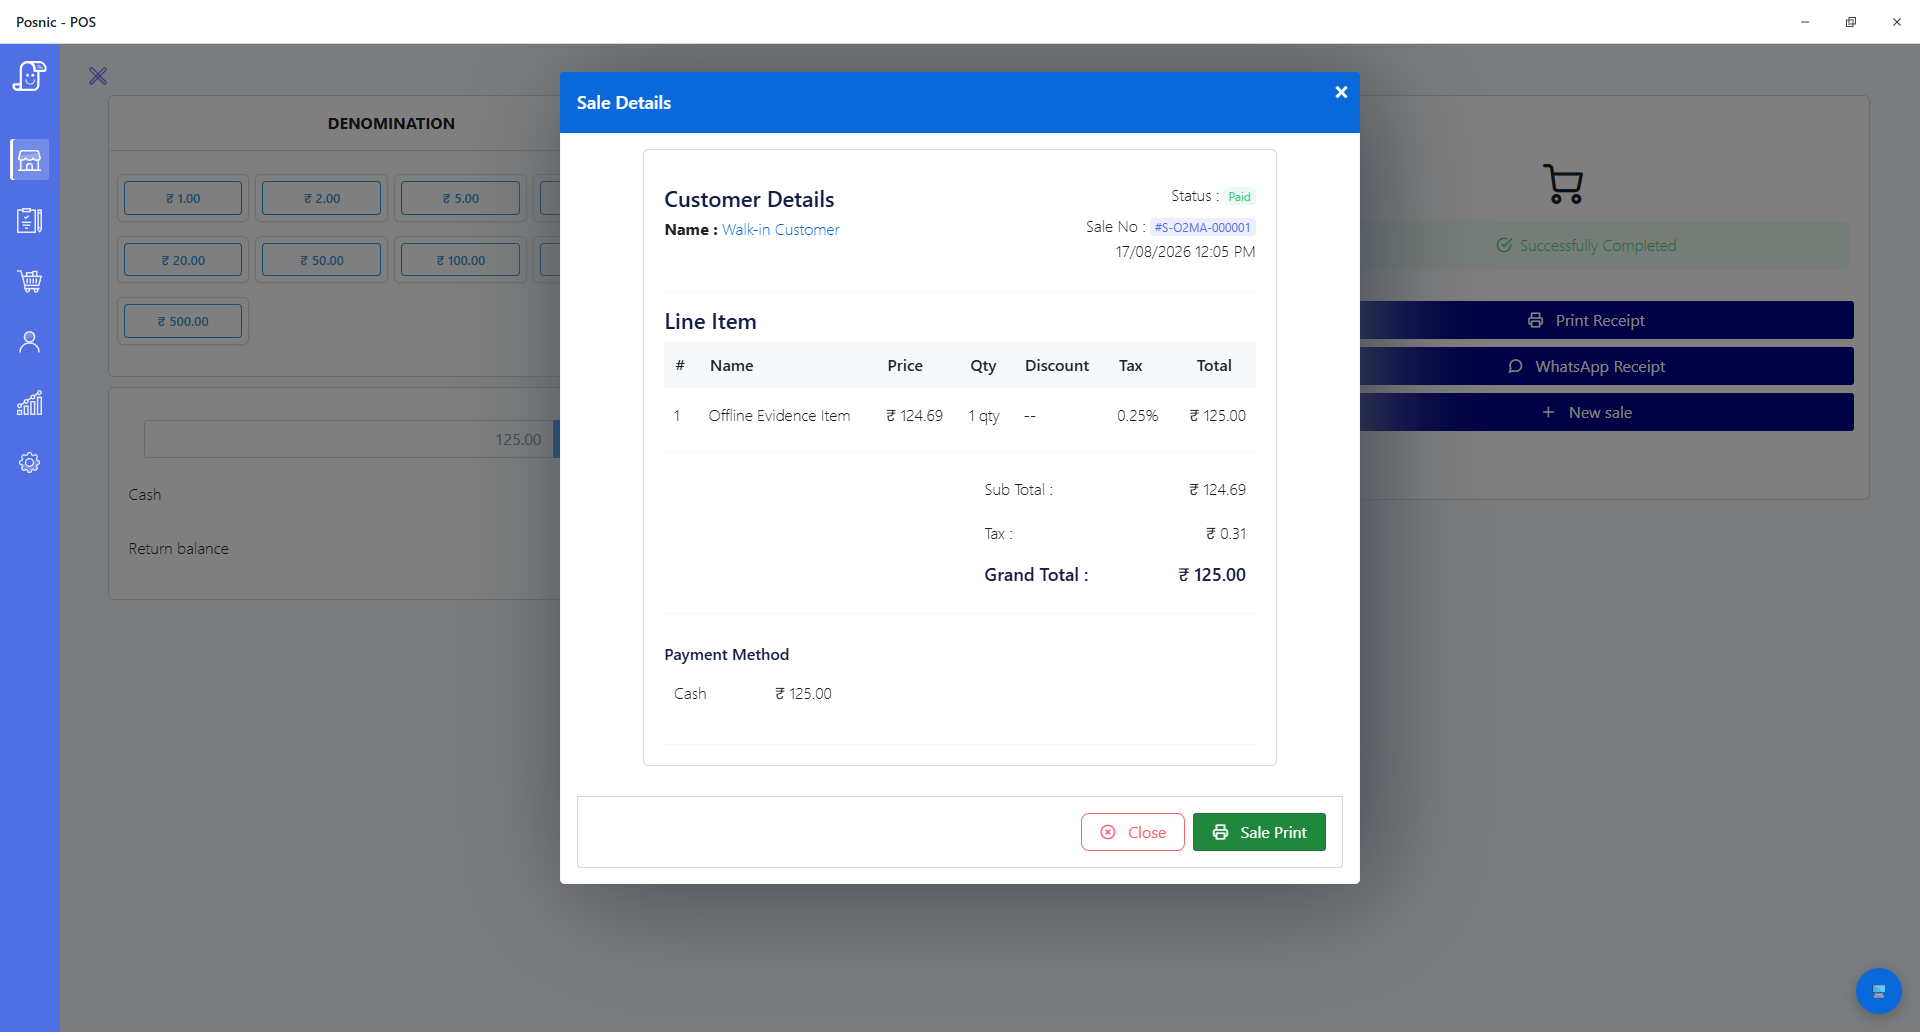
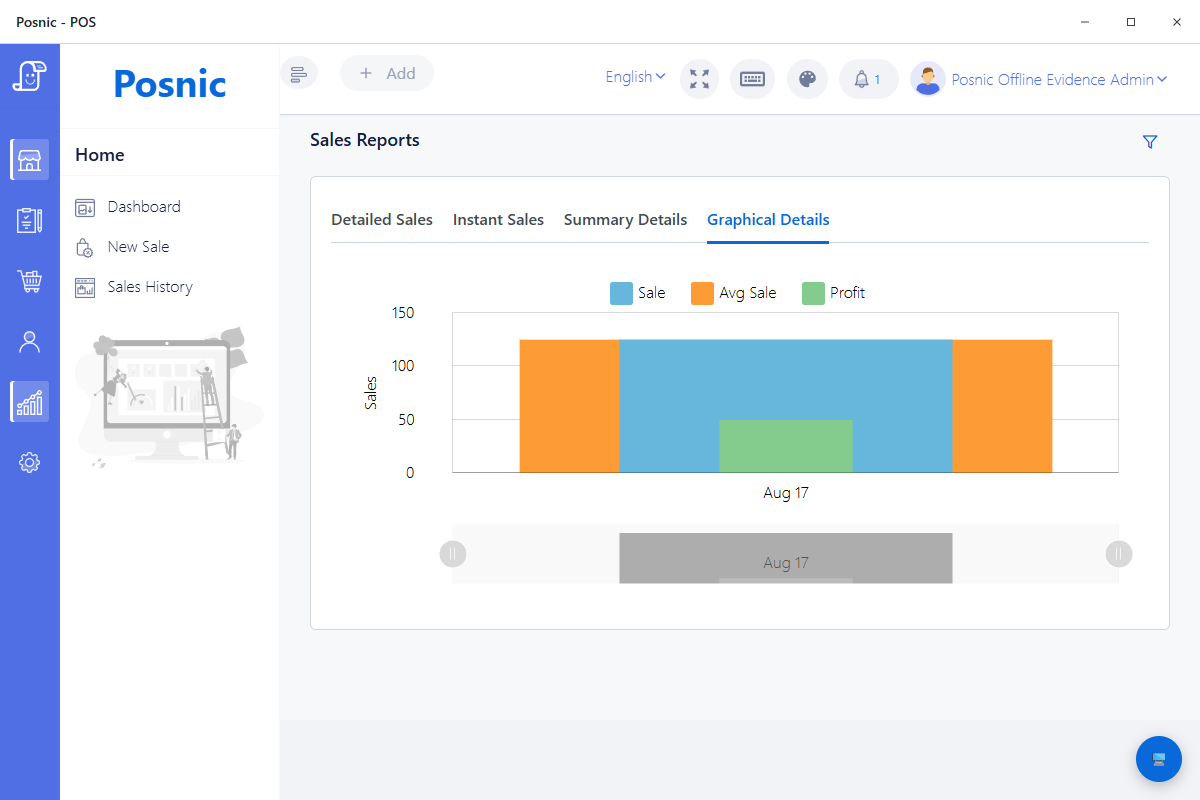
The archived Windows portable run completed and reopened one INR 125 cash sale while external HTTPS was blocked inside Electron. It was not a cafeteria queue, meal-account or full network-outage test.
57 vertical source tests passed
Quick item, weighed quantity, sale call-path, kiosk-column and chart-lifecycle tests passed at the pinned commit. They establish code paths rather than a cafeteria service period.
91 kiosk-focused tests passed
The pinned source contains guarded kiosk settings, item availability, order processing and report paths. No complete customer order, payment, kitchen output or physical kiosk was accepted.
KOT is documented, not accepted here
The user guide and source contain KOT and Easy Table paths, but no end-to-end cafeteria kitchen ticket, station route, token handoff or service-period reconciliation was run.
35 protocol tests used no device
Receipt, report, drawer, cutter and scale protocol cases passed without a physical printer, scanner, drawer, scale, display, driver, cable or Windows spooler.
Cafeteria-specific controls are unproved
A pinned source search found no cafeteria, canteen, school-meal, student-account, meal-entitlement, subsidy or prepaid-meal-balance implementation. Do not sell those outcomes from generic customer or payment fields.
Separate payment from meal entitlement
A person receiving food is not always a retail customer. The institution must define which system decides eligibility, price and identity before choosing devices or importing records.
| Service model | Decision before service | POS record | Acceptance boundary |
|---|---|---|---|
| Walk-in retail sale | Current menu price and payment method | Normal sale with items, tax where applicable, payment and receipt | Prove sale, refund, close and physical output on the target counter |
| Staff or student account | Approved identity and account policy | Sale linked only to the identifier and account data the institution needs | Prove authorization, privacy, correction, retention, export and account reconciliation |
| Prepaid meal balance | Who may load, spend, refund and adjust value | Sale plus a separate auditable balance movement | Prove top-up, duplicate prevention, reversal, insufficient balance and ledger reconciliation |
| Subsidized or entitled meal | The institution or program determines eligibility and meal-count rules | Service event linked to the minimum approved entitlement reference | Prove program counting, duplicate controls, privacy and claim reconciliation with the responsible authority |
| Self-order or kiosk | Menu, accessibility, payment and staff-assistance rules | Durable order and sale references plus the kitchen outcome | Prove the installed customer UI, payment, kitchen, receipt, failures and close end to end |
Practical workflow
Design for the service period
Measure breakfast, lunch, break and event queues separately. Record arrival pattern, target service time, menu size, payment mix and staff stations instead of choosing hardware from an average-day guess.
Collect the minimum identity
A walk-in cash sale does not need a student record. When an institution requires identity or entitlement, document purpose, fields, access, retention, correction, export and deletion before scanning an ID.
Keep food information owned
The food operator must own current ingredients, allergen communication, availability and substitutions. A POS item label is not a food-safety review and must not silently replace the approved source.
Reconcile five ledgers
At close, compare service events, POS sales, payment settlement, account or entitlement movements, kitchen or token outcomes and approved refunds. A sales total alone cannot expose every gap.
Cafeteria service and reconciliation flow
Treat each handoff as a named test. A pilot passes only when one diner and one exception can be traced from menu decision through close.
Publish the approved menu
The service period exposes the intended items, prices, tax treatment, availability and institution-approved food information.
Choose the service model
The counter identifies a walk-in sale, account, prepaid balance, entitlement or self-order path without silently switching models.
Validate the basket
Required choices, quantity, sold-out items, substitutions and the applicable food-information handoff are resolved before commitment.
Resolve payment or entitlement
Paid, declined, insufficient-balance, entitled, duplicate, cancelled and staff-assisted outcomes remain distinguishable.
Create the durable POS record
The accepted transaction receives a stable reference, source, items, totals and outcome; a retry does not create a second sale or meal event.
Route preparation or handover
The correct kitchen, pickup or direct-service path receives the intended items and reference, and a failed output becomes visible.
Give usable proof
The diner and staff receive the token, receipt, account movement or entitlement confirmation required by the institution and market.
Reconcile the close
Operations compares service count, sales, payments, account or entitlement movements, kitchen outcomes, refunds and exceptions before sign-off.
Hardware and software required
Hardware
- Counter device tested at the real service height, lighting, noise level and rush-hour load.
- Receipt or token printer tested for paper-out, duplicate print, reconnect and staff replacement.
- Kitchen printer or display tested at every required preparation station and recovery path.
- Payment terminal supplied and supported by the merchant's payment parties when cards are accepted.
- ID, barcode or QR scanner only when an approved service model needs it; keep a staff fallback for unreadable credentials.
- Network and power protection with a documented response for POS, identity, payment and kitchen dependency failures.
- Accessible customer device and alternative staff-assisted path when self-ordering is offered.
Software and data
- Versioned menu, price, tax, meal-period and availability data with a named owner.
- Separate interfaces for POS sales and any institution-owned identity, prepaid or entitlement system.
- Role controls and an audit trail for refund, void, price, balance and entitlement exceptions.
- Food-information source and substitution process owned by the responsible food operator.
- Order, token or KOT routing with visible failed-output and reprint states when preparation is separate.
- Reports and exports that reconcile service events, sales, payment, account or entitlement movements and exceptions.
- Documented privacy purpose, field inventory, access, retention, correction, export and deletion rules.
Setup sequence
- Name the service periods, expected covers, queue peak, stations, staff roles and fallback owner for the pilot.
- Classify each diner path as walk-in sale, account, prepaid balance, entitlement or self-order before configuring fields.
- Map which system is authoritative for identity, eligibility, prices, food information, payment and meal counts.
- Remove identity fields that are not required and approve access, retention, correction, export and deletion rules.
- Load a short representative menu with current price, tax, availability and institution-approved food-information references.
- Set role permissions for refund, void, manual price, account adjustment, entitlement override and reprint.
- Complete normal, duplicate, cancelled, declined, insufficient-balance and staff-assisted scenarios without unexplained records.
- Test every physical printer, scanner, display, terminal, cable, driver and power path repeatedly.
- Use WCAG 2.2 to test any web or kiosk interface, then assess the complete installed service against applicable accessibility requirements.
- Disconnect internet, LAN, local service, identity source, payment service and kitchen output separately; record fallback and recovery.
- Restore an off-device backup into a separate clean profile and reconcile the fields and records required by the cafeteria.
- Close one representative service period by reconciling meal events, sales, settlement, account or entitlement movements, kitchen output and refunds.
What each person sees
Diner
Can understand price or entitlement, correct the order, request help, know the outcome and receive usable proof without unnecessary identity exposure.
Counter staff
Sees the service model and outcome, handles approved exceptions and does not invent balance, eligibility or allergen decisions at the queue.
Kitchen or handover
Receives the intended items and reference through an accepted route with a visible recovery path for failed output.
Finance or program owner
Reconciles service counts, POS records, payment settlement, account or entitlement movements, refunds and approved adjustments.
Privacy and food owners
Can inspect which identity and food-information fields are used, who changes them and how an incorrect record is corrected.
Product evidence to inspect
Mistakes to avoid
Avoid these during rollout
- Treating a student ID as permission to collect every available student field.
- Using a normal payment mode as a prepaid-value or meal-entitlement ledger.
- Letting cashiers decide eligibility, food safety or allergen substitutions from memory.
- Calling source-tested KOT or kiosk paths an accepted physical cafeteria implementation.
- Buying scanners, kiosks and payment terminals before one complete service path reconciles.
- Measuring queue speed without tracking duplicate, declined, abandoned and staff-assisted outcomes.
- Closing from one sales total while ignoring meal counts, account movements, kitchen failures and refunds.
- Keeping the only backup on the counter computer or accepting restore without record reconciliation.
Run the 18-record cafeteria acceptance pack
Record the service model, menu, identity purpose, entitlement owner, food-information source, payment, kitchen route, accessibility, failures, restore and closing reconciliation. Observation and approval fields remain blank until the installed system is exercised.
Primary sources used
archived Posnic evidence
Stable public release used for the package and product boundary.
Pinned Posnic user guide
Primary product documentation for sale, restaurant, KOT, table, report and kiosk statements used with declared runtime limits.
Pinned Posnic test source
Exact source tree containing the vertical, kiosk, receipt, report and hardware-protocol tests cited by the evidence record.
U.S. school-meal eligibility rules
Official eCFR text for 7 CFR Part 245 as issued on 14 August 2026. It is a United States example showing that eligibility and meal-count rules belong to the responsible program, not an ordinary POS payment label.
NIST Privacy Framework
Voluntary risk-management framework used to structure identity purpose, processing, access and privacy review; it is not a cafeteria legal certification.
W3C WCAG 2.2
Current W3C Recommendation for accessible web content, including content used on kiosk devices.
PCI SSC merchant resources
Primary payment-security resources for merchants; payment providers still define the exact integration, device and card-data scope.
UK food-allergen guidance
Official food-business guidance used as one jurisdictional example; the responsible operator must confirm current local food-information duties.
Questions
Does the archived Posnic evidence include student or prepaid meal accounts?
This review did not establish a cafeteria, canteen, school-meal, student-account, meal-entitlement, subsidy or prepaid-meal-balance implementation at the pinned source. Treat those as separate requirements until they pass an installed acceptance test.
Can a cafeteria use a normal POS sale without student identity?
Yes, a walk-in retail sale may need no student record. Collect identity only when an approved account or entitlement process requires it, and document purpose, access, retention and correction.
Is a payment mode the same as a prepaid meal balance?
No. A payment label records how a sale was settled. Prepaid value needs a separate auditable movement ledger for load, spend, reversal, adjustment, balance and reconciliation.
Can the POS decide whether a diner receives a subsidized meal?
The responsible institution or program defines eligibility and meal-count rules. A POS can record an approved outcome only after the authority, data flow, duplicate control and reconciliation method are accepted.
Does Posnic prove cafeteria KOT or token printing?
The pinned documentation and source contain KOT and related report paths, but this review did not run an end-to-end cafeteria kitchen ticket, token handoff or physical printer route. Test the exact stations and failure recovery.
Does WCAG 2.2 certify a cafeteria kiosk?
No. WCAG 2.2 gives testable web-content accessibility criteria and explicitly includes kiosk devices in scope, but the complete installed hardware, software and assisted-service path still need assessment under applicable requirements.
What should a cafeteria reconcile at close?
Compare service events, POS sales, payment settlement, account or entitlement movements, kitchen or token outcomes, refunds, voids and unresolved exceptions. Preserve evidence for every mismatch.
Where Posnic fits
Archived Posnic evidence has one reproduced local cash sale plus documented and source-tested sale, KOT, report and guarded kiosk paths. It does not have accepted cafeteria, student-account, prepaid-meal, entitlement, subsidy, allergen, nutrition, physical-device, provider-payment, accessibility, complete-service-period or local compliance evidence in this review. Use the acceptance record on the exact implementation before production.